Signs your new tile shower will leak!
You’ve hired someone to build your tile shower in your bathroom, but how do you know he or she’s doing it correctly? How do you know that you won’t have an upstairs shower leaking into your downstairs kitchen?
This post contains affiliate links. The site owner may earn a commission should you click on an affiliate link and make a purchase. Read more
Most homeowners don’t know all the in’s and out’s of remodeling their bathroom. Sadly, the contractors they’ve hired don’t always know either, or worse, they simply don’t do it right! After all, the last thing that you want to do is pay for a brand new bathroom with a shower leaking into the wall.
This post will arm you with a few things to look for so that you can monitor the construction and waterproofing of your shower while it’s being built. This post covers traditional shower construction which is still the most common method for building a shower.
Want to know more about what a traditionally constructed shower is? Read this post:
Shower Waterproofing Crash Course
5 common mistakes that could leave you with a shower leaking from day one
1. Cutting, rather than folding, the corners on a shower liner
However, an outside corner will need to be cut. Read down further to see how to address this.
It is possible to cut the corners, patch them properly, and have it not leak. How do you know if you have a leaking shower? See number 5.
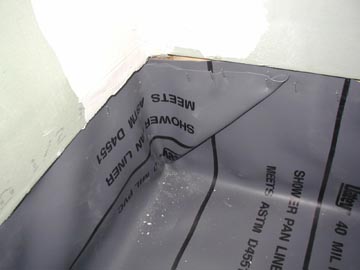
2. Shower liner doesn’t go over curb or isn’t high enough
Most of the problems in this regard have to deal with how the curb is waterproofed. The shower pan liner is supposed to go up the wall 3 inches above the framing of the curb according to Tile Council of North America (TCNA) standards. It also needs to go up and over the curb to the non-wet area (the front of the curb).
Where it gets tricky is at the corners of the curb because you normally have to cut it to get it to fold over the framing. The shower pan companies make pre-formed corners for just this purpose. Make sure you, or your installer, use them. This is one of the most common causes of a leaking shower.
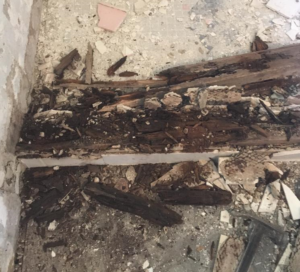
If your curb looks like the top photo, that’s not good.
3. Nails too low in shower
What good does it do to install shower pan liner 3″ above the curb if you then nail below the curb level? If you see nails below the curb level in the shower, it’s time to look for another tile setter.
Keep in mind, this applies to traditional shower construction. If you shower is being built with products like Schluter Kerdi or Custom Redgard, this won’t apply. But if you are doing a mud pan with a liner underneath the mud, nailing below the curb level is a no-no.
In regards to the curb, there should be no nails or penetrations of any kind on the inside or top of the curb. Nails, staples, or glue can be used to attach the liner to the front of the curb (the side that doesn’t get wet).
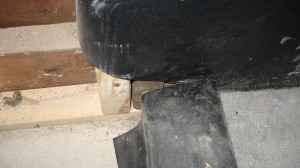
4. Using cement board on the curb
The proper way to do it is with metal lath and a sand/cement mix- the same thing the shower pan is supposed to be made out of.
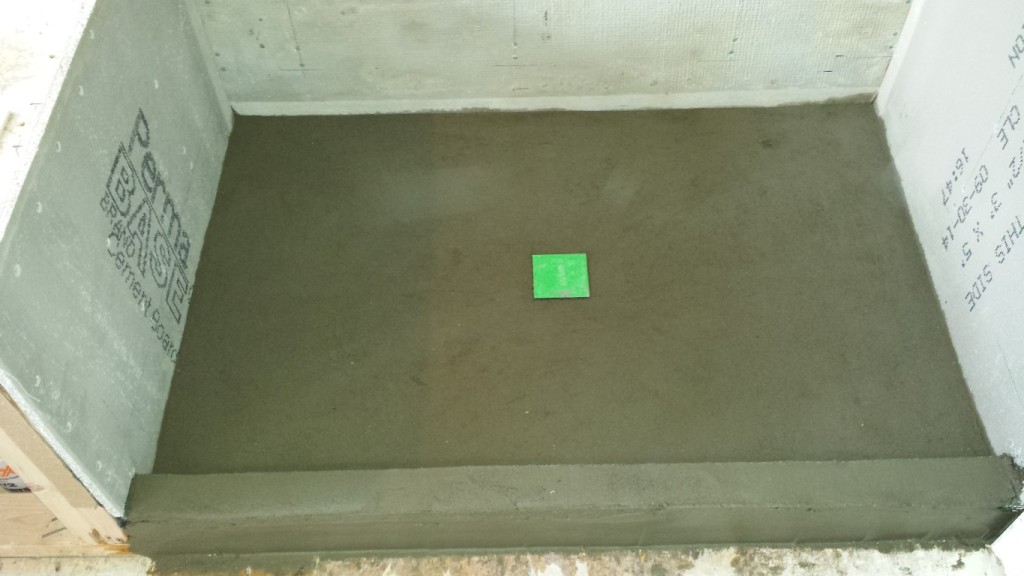
5. No flood test
While this doesn’t cause shower leaking it certainly will tell you whether you have a leak or not. A flood test is when you plug the drain and fill the shower up with water to just below the top of the curb.
Flood testing a shower pan: Why it’s done and how to do it
With the drain plugged the water has nowhere to go unless there’s holes or penetrations in the liner.
If you have a leak anywhere, you will know before it gets tiled. Put a mark on the wall and wait 24 hours. If the water is lower than the mark then you have a shower leaking somewhere.
Insist on a flood test. Write it into the contract if necessary.
These tips can help homeowners and contractors to identify if their shower is being built incorrectly. Obviously, it’s better to know if there’s a leak at this point then to find out it leaks after it’s tiled and the shower glass is in. It’s also nice to know that it doesn’t leak before everyone gets paid.
6. No waterproofing on cement board
Even though many contractors seem to think so cement board IS NOT waterproof and is actually the opposite. if you were to take a scrap of concrete board and put it in a bucket of water by tomorrow it will be double the size over night. A common practice we see is cement board run to the concrete floor with no gap. This creates a perfect wick for water to climb your new shower walls turning them into mush. Because of this we do not recommend using cement board at all infact many superior products are currently available. One reason contractors use cement board to this day is simply the cost. Cement board usually comes in at 1/4 of the price of a foam board product and although it saves the contractor, its not going to save you in the long run. Insist that your next shower is built with foam.