So Whats the Difference?
What sets AD Tile Fitters Apart from the rest? the answer is proper practices and fine craftsmanship. Creating a lasting tile installation is no easy task and if you don't honor all the standards its easy to see failing results such as cracked or popping tile, cracked powdered grout, or leaking showers. With the price of materials climbing every day its important to hire a qualified installer. We have proudly completed the Certified Tile Installers Test to prove that we uphold industry standards.
Something commonly overlooked is perimeter movement. his is oTne of the simplest reasons a system can fail. Although minute, your home expands and contracts with the seasons and rising/falling humidity. If materials are installed tight against the studs or drywall "tenting" can occur where the floor buckles up. On a hardwood floor the tent will be an obvious speed bump in the floor, but on a tile floor you can actually experience a loud popping noise and on rare occasion see tile jump into the air. In this picture we are preparing to grout a pebble floor. To honor perimeter movement and still grout the system complete to the wall we install a foam backer rod. This foam backer rod stops grout from entering the movement joint and allows expansion. Once the grout is dry the top can be lightly chipped away and the wall tile can be set.

Another critical movement joint is located at any change of plane weather it be from wall to wall or wall to floor. A proper movement joint has a small gap from surface to surface to be filled with silicone. A very common mistake we see is when the corner is grouted solid and clear silicone is applied over the grout. This is an improper movement joint once the wall begins to move the grout will start to crack along with the silicone. silicone needs a foam backer to perform properly. Once the joint has cracked water will be able to penetrate behind the tile and if the shower has not been properly waterproofed it will begin to leak. This can have disastrous results depending on its location inside the home.
Directional Troweling is a very important practice to follow and it allows air to escape easily from behind the tile during installation. if directional troweling is not honored you can experience large air pockets under the tile that will sound hollow when tapped on. A common result would be tile having a much lower breaking strength from falling objects and perhaps cracking under foot traffic alone.
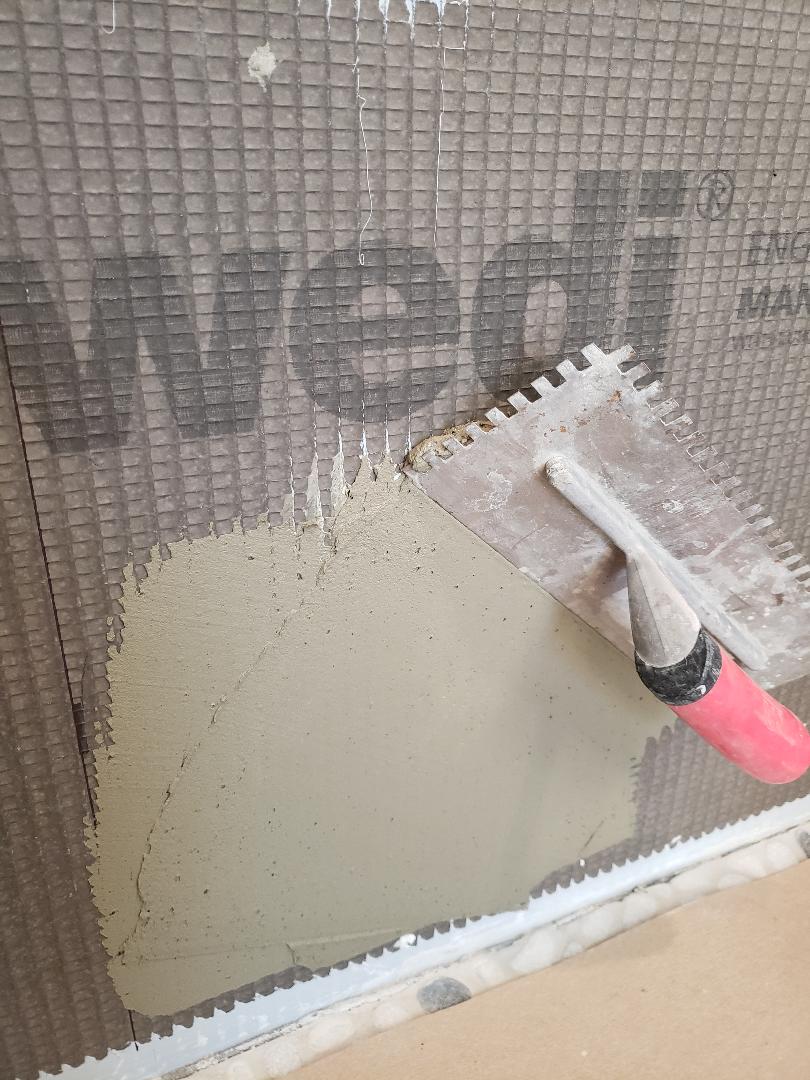
Perhaps the most crucial step to a proper installation is "Burning In" the thinset to the substrate. This is done with the flat side of the trowel and drives cement deep into the surface pores keying it into the backer. When thinset is applied to the back of the tile alone and not keyed into the wall or floor you will have a much lower shear strength. Typically depending on thinset you will have a shear strength of 250-400 PSI. When not keyed in you may experience a shear strength of only 20 PSI and we have seen tile almost fall off the wall during demo.


In addition to burning in the thinset its also important to "back Butter" each tile. By applying a skim coat of thinset to the back of every tile you can be sure to achieve the proper coverage. When tile are not back buttered it is very difficult to get more than 40% coverage the TCNA handbook requires a minimum of 95% coverage in wet areas so you can see why installations lacking back buttering will fail. The main failure will be tile coming lose and falling off the wall or having a hollow sound.
While installing tile it is important to shift the tile in the opposite direction as the ridges run for the same distance the ridges are, usually 1/4 to 1/2 inch. This collapses the ridges created by the trowel and helps achieve full coverage.
Skinning is when the thinset has been keyed into the substrate and has been allowed to sit for longer than the products recommended working time. This creates a thin layer of dry thinset on the surface of the ridges and even with back buttering can prevent full contact. A result of skinning is when portions of the installation seam to be installed properly but other portions are coming loose. If you notice in the first photo the thinset on top running vertically is a different color than the horizontal ridges, the horizontal ridges have been allowed to skin over for a 30 minute period. The second picture demonstrate the difference in consistency by combing threw the thinset. The skinned thinset curls and falls off while the material to the right is fluid and spreads easily.
